Get started with 4D construction planning with Trimble Connect Planner
VIDEO: Trimble Connect Planner e-learning. Watch this video to get all the details on how to use Planner for building erection planning as well as cast-in-place concrete projects, and infrastructure projects.
Construction planning often happens outside the model environment. Teams may have a well-structured 3D model in Trimble Connect, while the actual sequencing is managed separately in Excel or MS Project. That creates a gap between the schedule and the physical scope of work.
Trimble Connect Planner addresses this by adding the time dimension directly to the model, making it easier to define sequences, review construction stages visually, and communicate the plan across the project team.
In this 30-minute e-learning, we introduce the core workflow in Planner, show how it can be used for both building and infrastructure projects, and explain the key setup options that help teams get started.
The challenge with construction planning
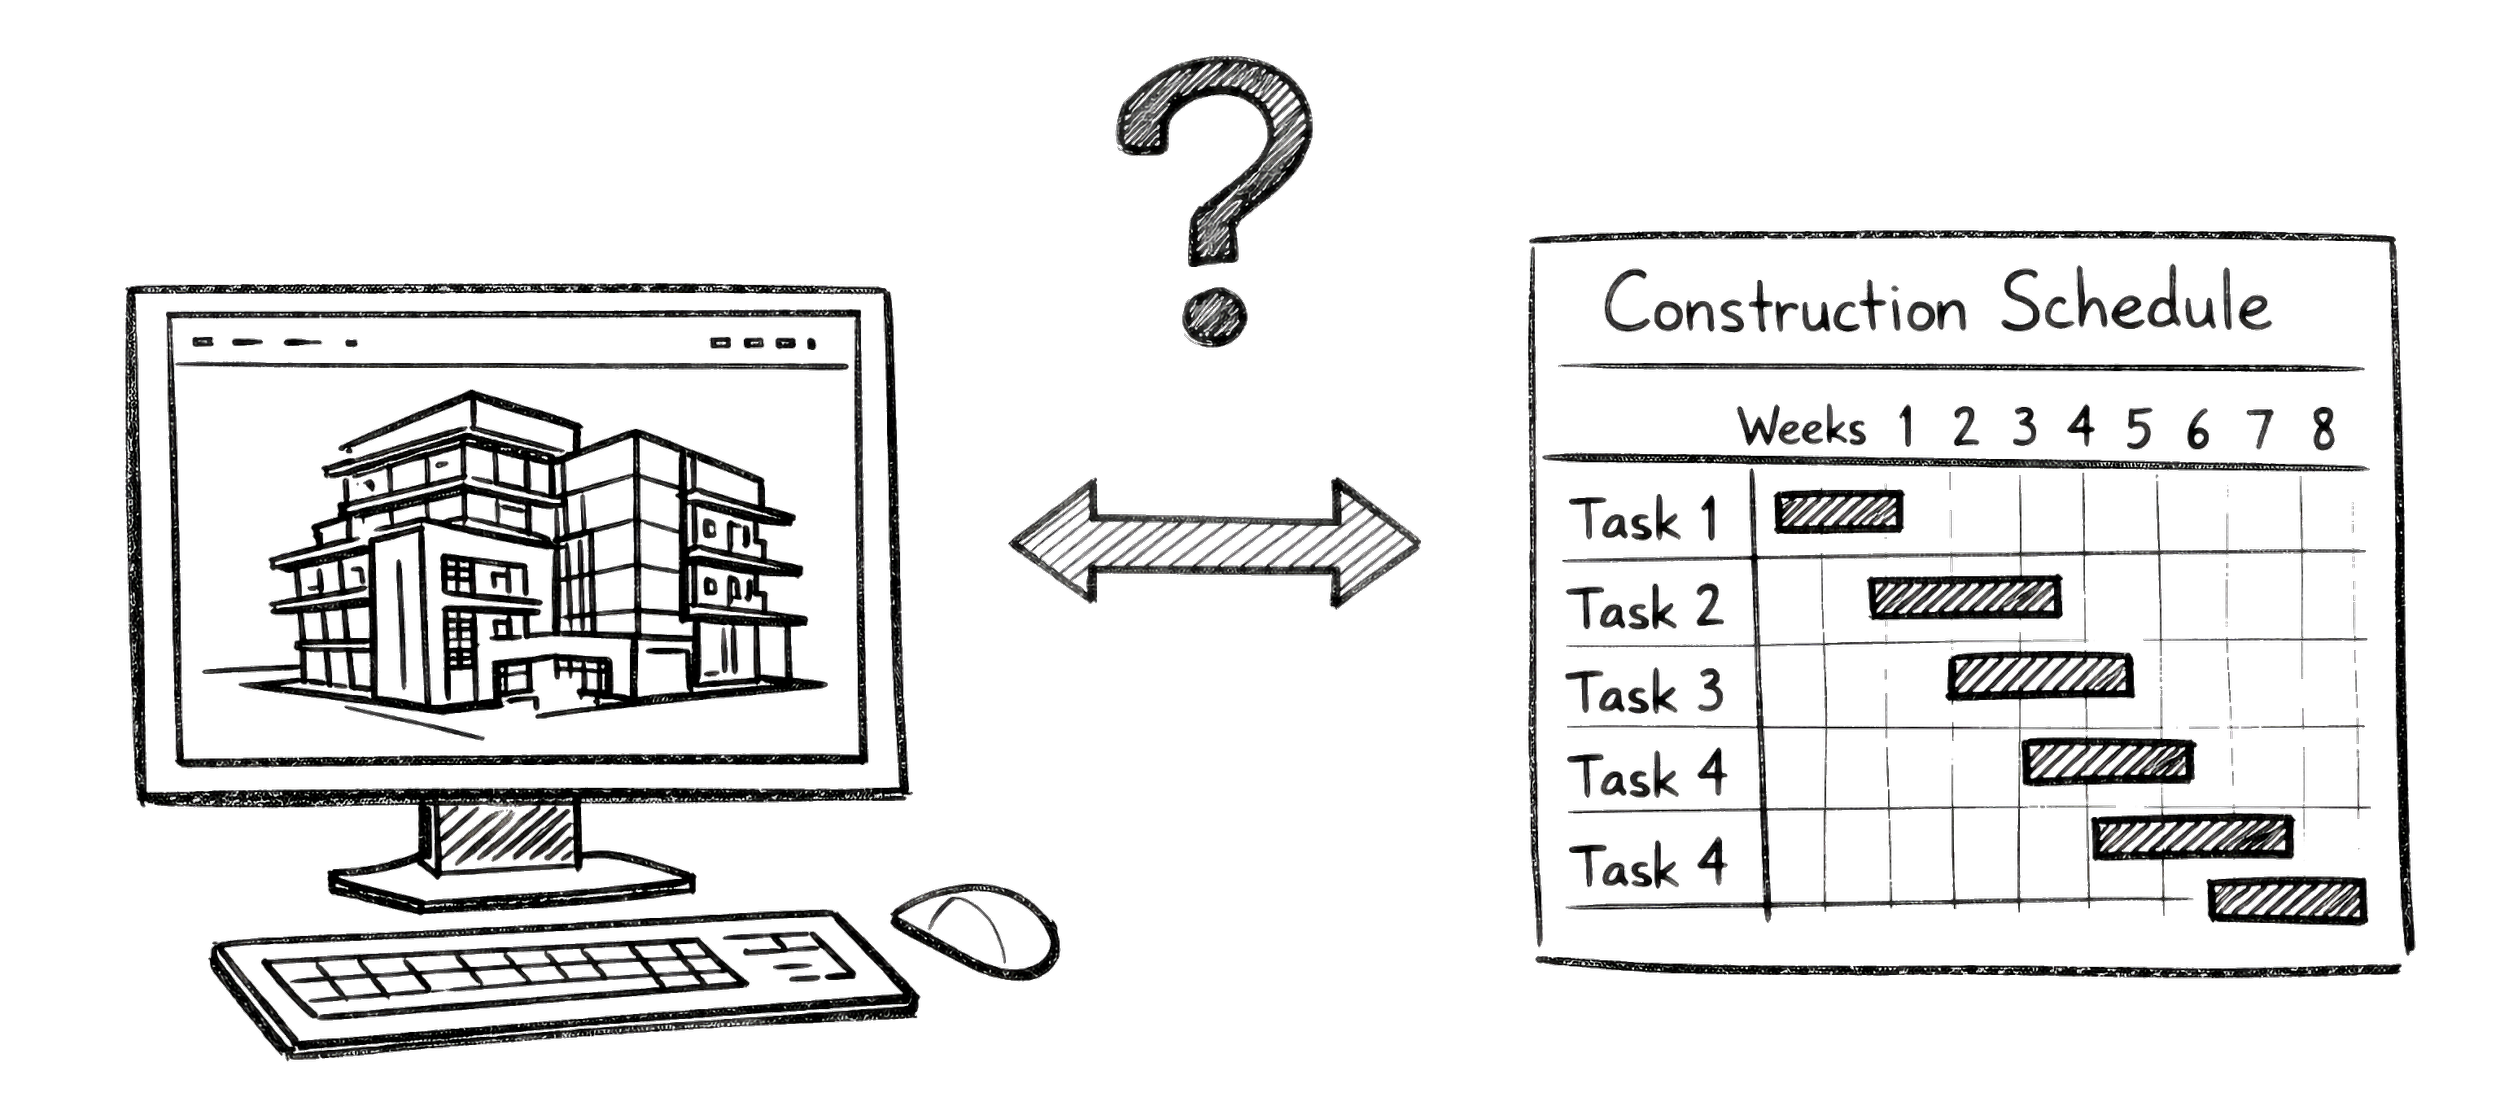
ILLUSTRATION: Many project planners experience challenges when the 3D model is disconnected from the planning tools, like Excel and MS Projects.
Trimble Connect is widely used as a shared model environment in construction projects. It gives engineering specialists, project managers, supply chain teams, and site personnel a common platform for collaboration around models and product information.
But when it comes to planning, the workflow often shifts elsewhere. In many projects, the schedule is still developed in spreadsheets or traditional planning tools.
Those tools work well for managing dates and dependencies, but they are disconnected from the model itself. As a result, the team has to interpret rows in a schedule and mentally link them to physical elements in the model and on site.
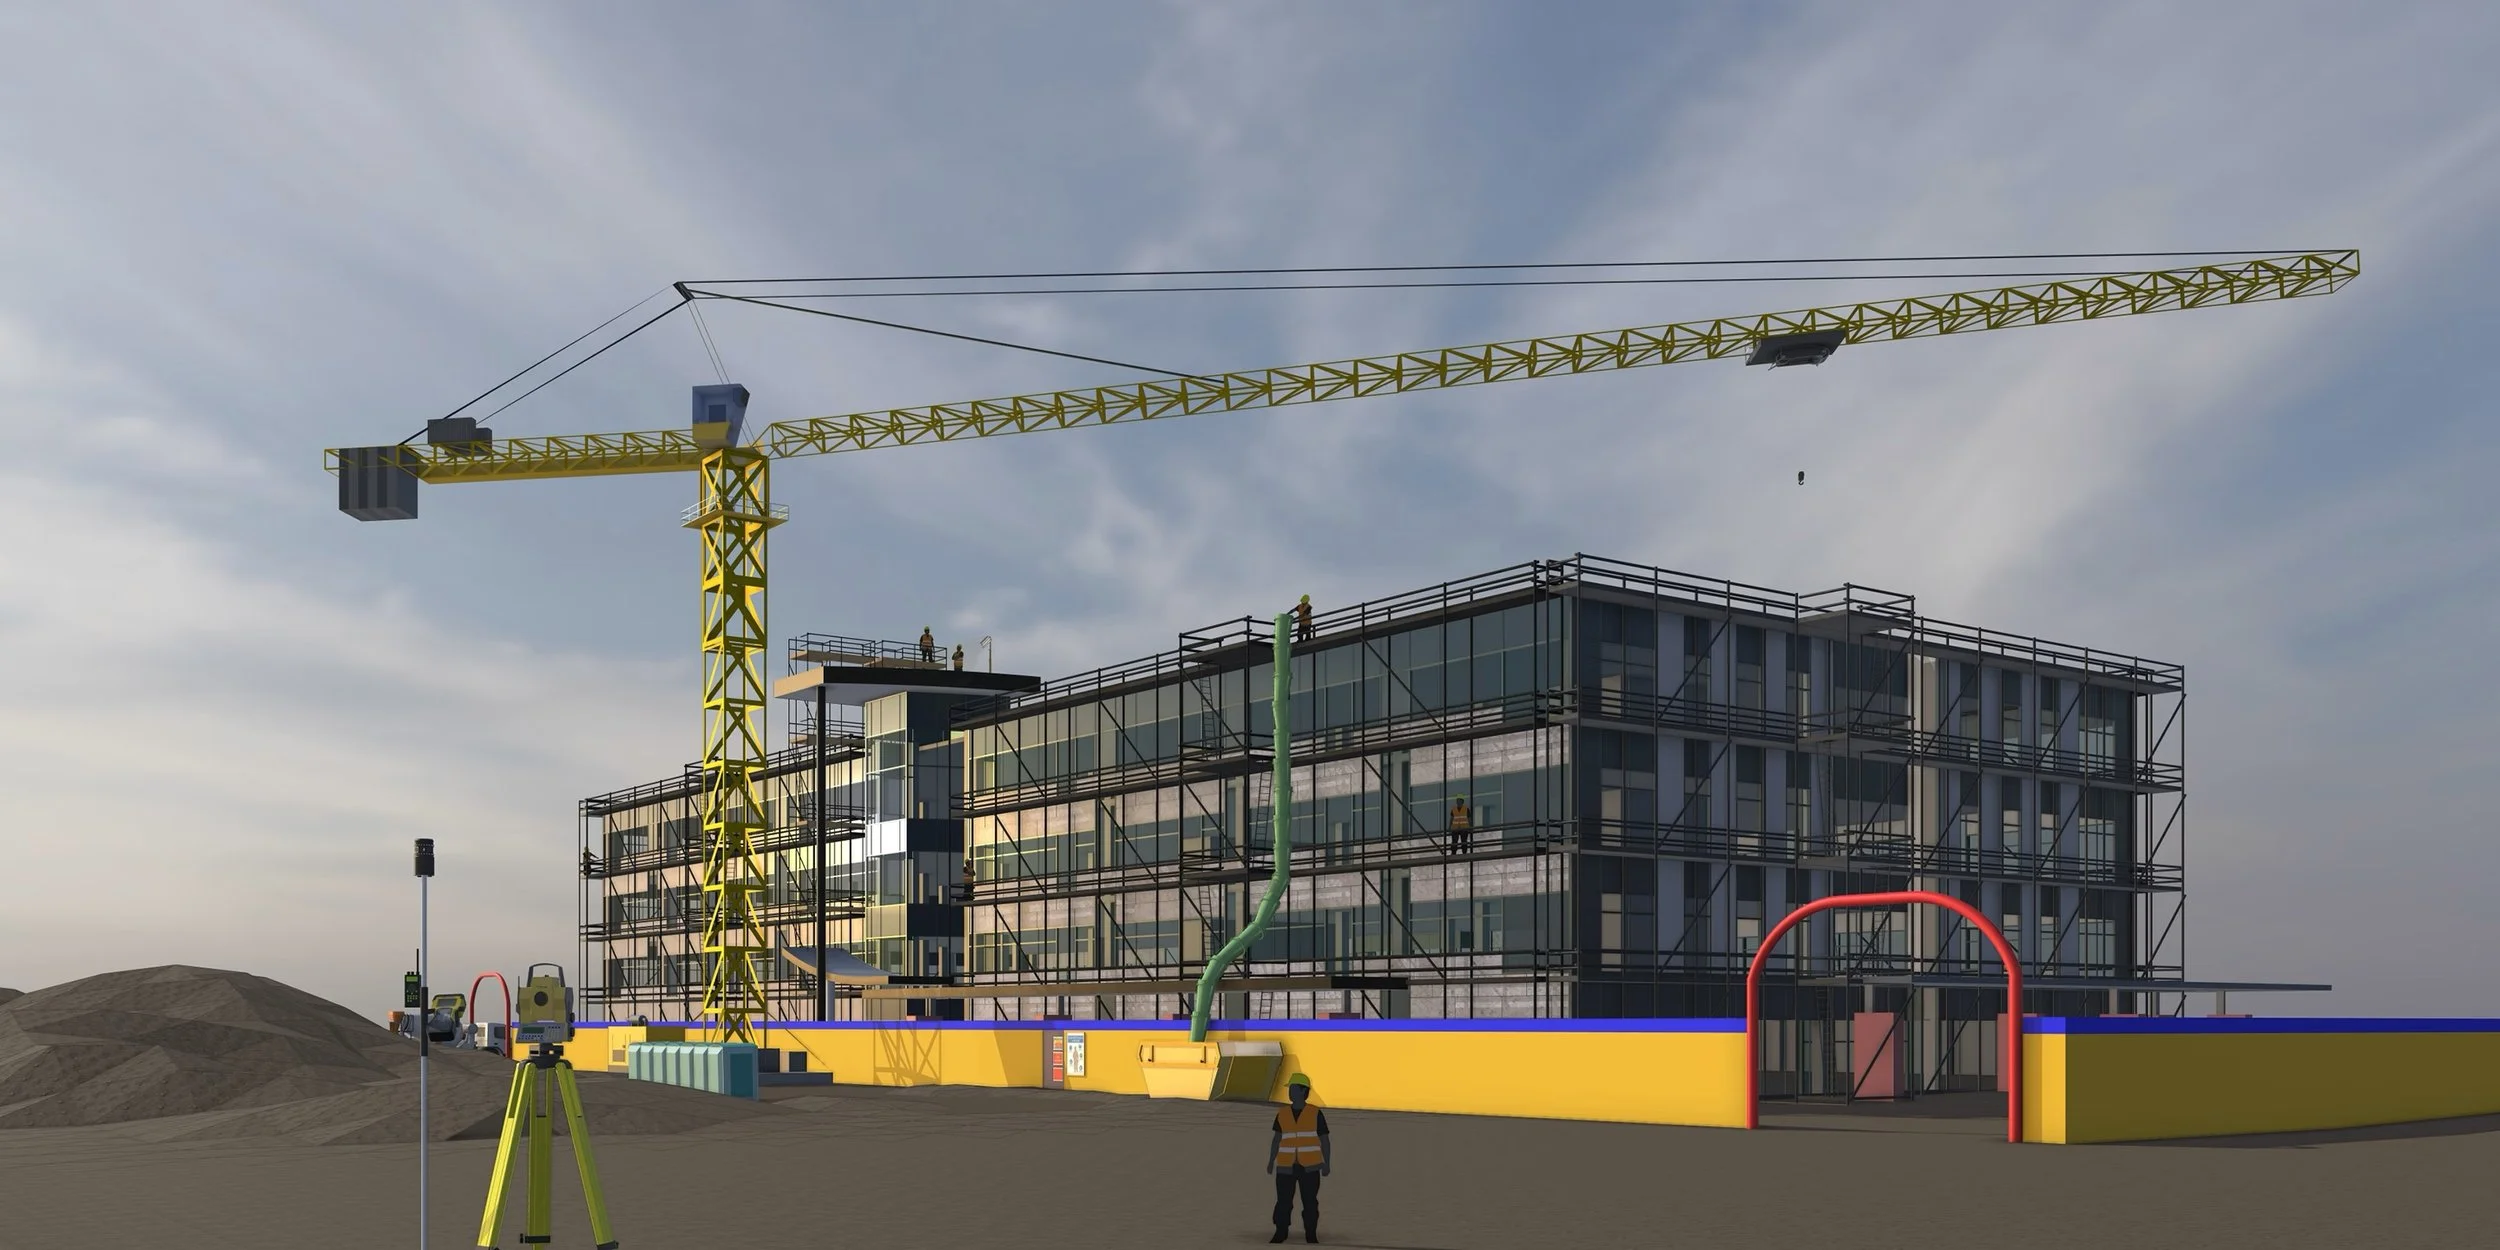
IMAGE: Fornebubanen - K7 Lysaker and Vækerø stations: On this urban rail project, Veidekke have been looking into how they can use Planner to support takt-based production planning in a confined tunnel environment.
That makes it harder to verify the sequence visually, harder to explain the plan clearly to crews and subcontractors, and more difficult to manage revisions when time is not tied directly to the model.
What is missing is the fourth dimension: the ability to connect sequence and timing to the 3D environment in a practical way.
What Trimble Connect Planner does
Trimble Connect Planner is an extension to Trimble Connect that enables 4D construction planning directly in the model environment.
Instead of creating a schedule separately and then trying to relate it back to the model, users can define the sequence visually, assign dates and durations, and review the construction process over time.
Because Planner is built into Trimble Connect, it fits naturally into workflows that many teams already use. It extends the platform from coordination and model sharing into construction planning, without requiring users to move between disconnected tools.
The solution has developed around actual project needs. It has been used in projects involving prefabricated concrete and steel, and is also being introduced in infrastructure workflows where temporary works, logistics, and sequencing are central to execution.
Overhalla Betongbygg improves planning with Trimble Connect Planner Extension
To improve installation planning, Overhalla Betongbygg have collaborated with Construsoft to develop the Trimble Connect Planner extension, a customized and user-friendly solution that effectively meets important needs related to for construction planning.
What the e-learning covers
The e-learning in the video above is designed as a practical introduction to working with Planner. It has chapters and the captions are searchable to allow you to easily find topics later.
It starts with Example 1 where we focus on a basic workflow for building projects, showing how to create a 4D erection plan by defining sequence, assigning dates, and reviewing the result in the timeline.
It then moves to Example 2 which covers methods and functions important for cast-in-place and infrastructure projects, where the workflow includes grouped tasks, temporary structures, deconstruction activities, and staged operations such as cast-in-place concrete work, mass handling, and crane or equipment placement.
The final part of the training focuses on setup and administration, including permissions, calendars, label templates, export settings, and other project-level configurations.
Functions and topics are introduced along the way and users should watch the whole e-learning, not just Example 1 or 2.
Example 1: Basic planning
General workflow, starting with sequence before dates
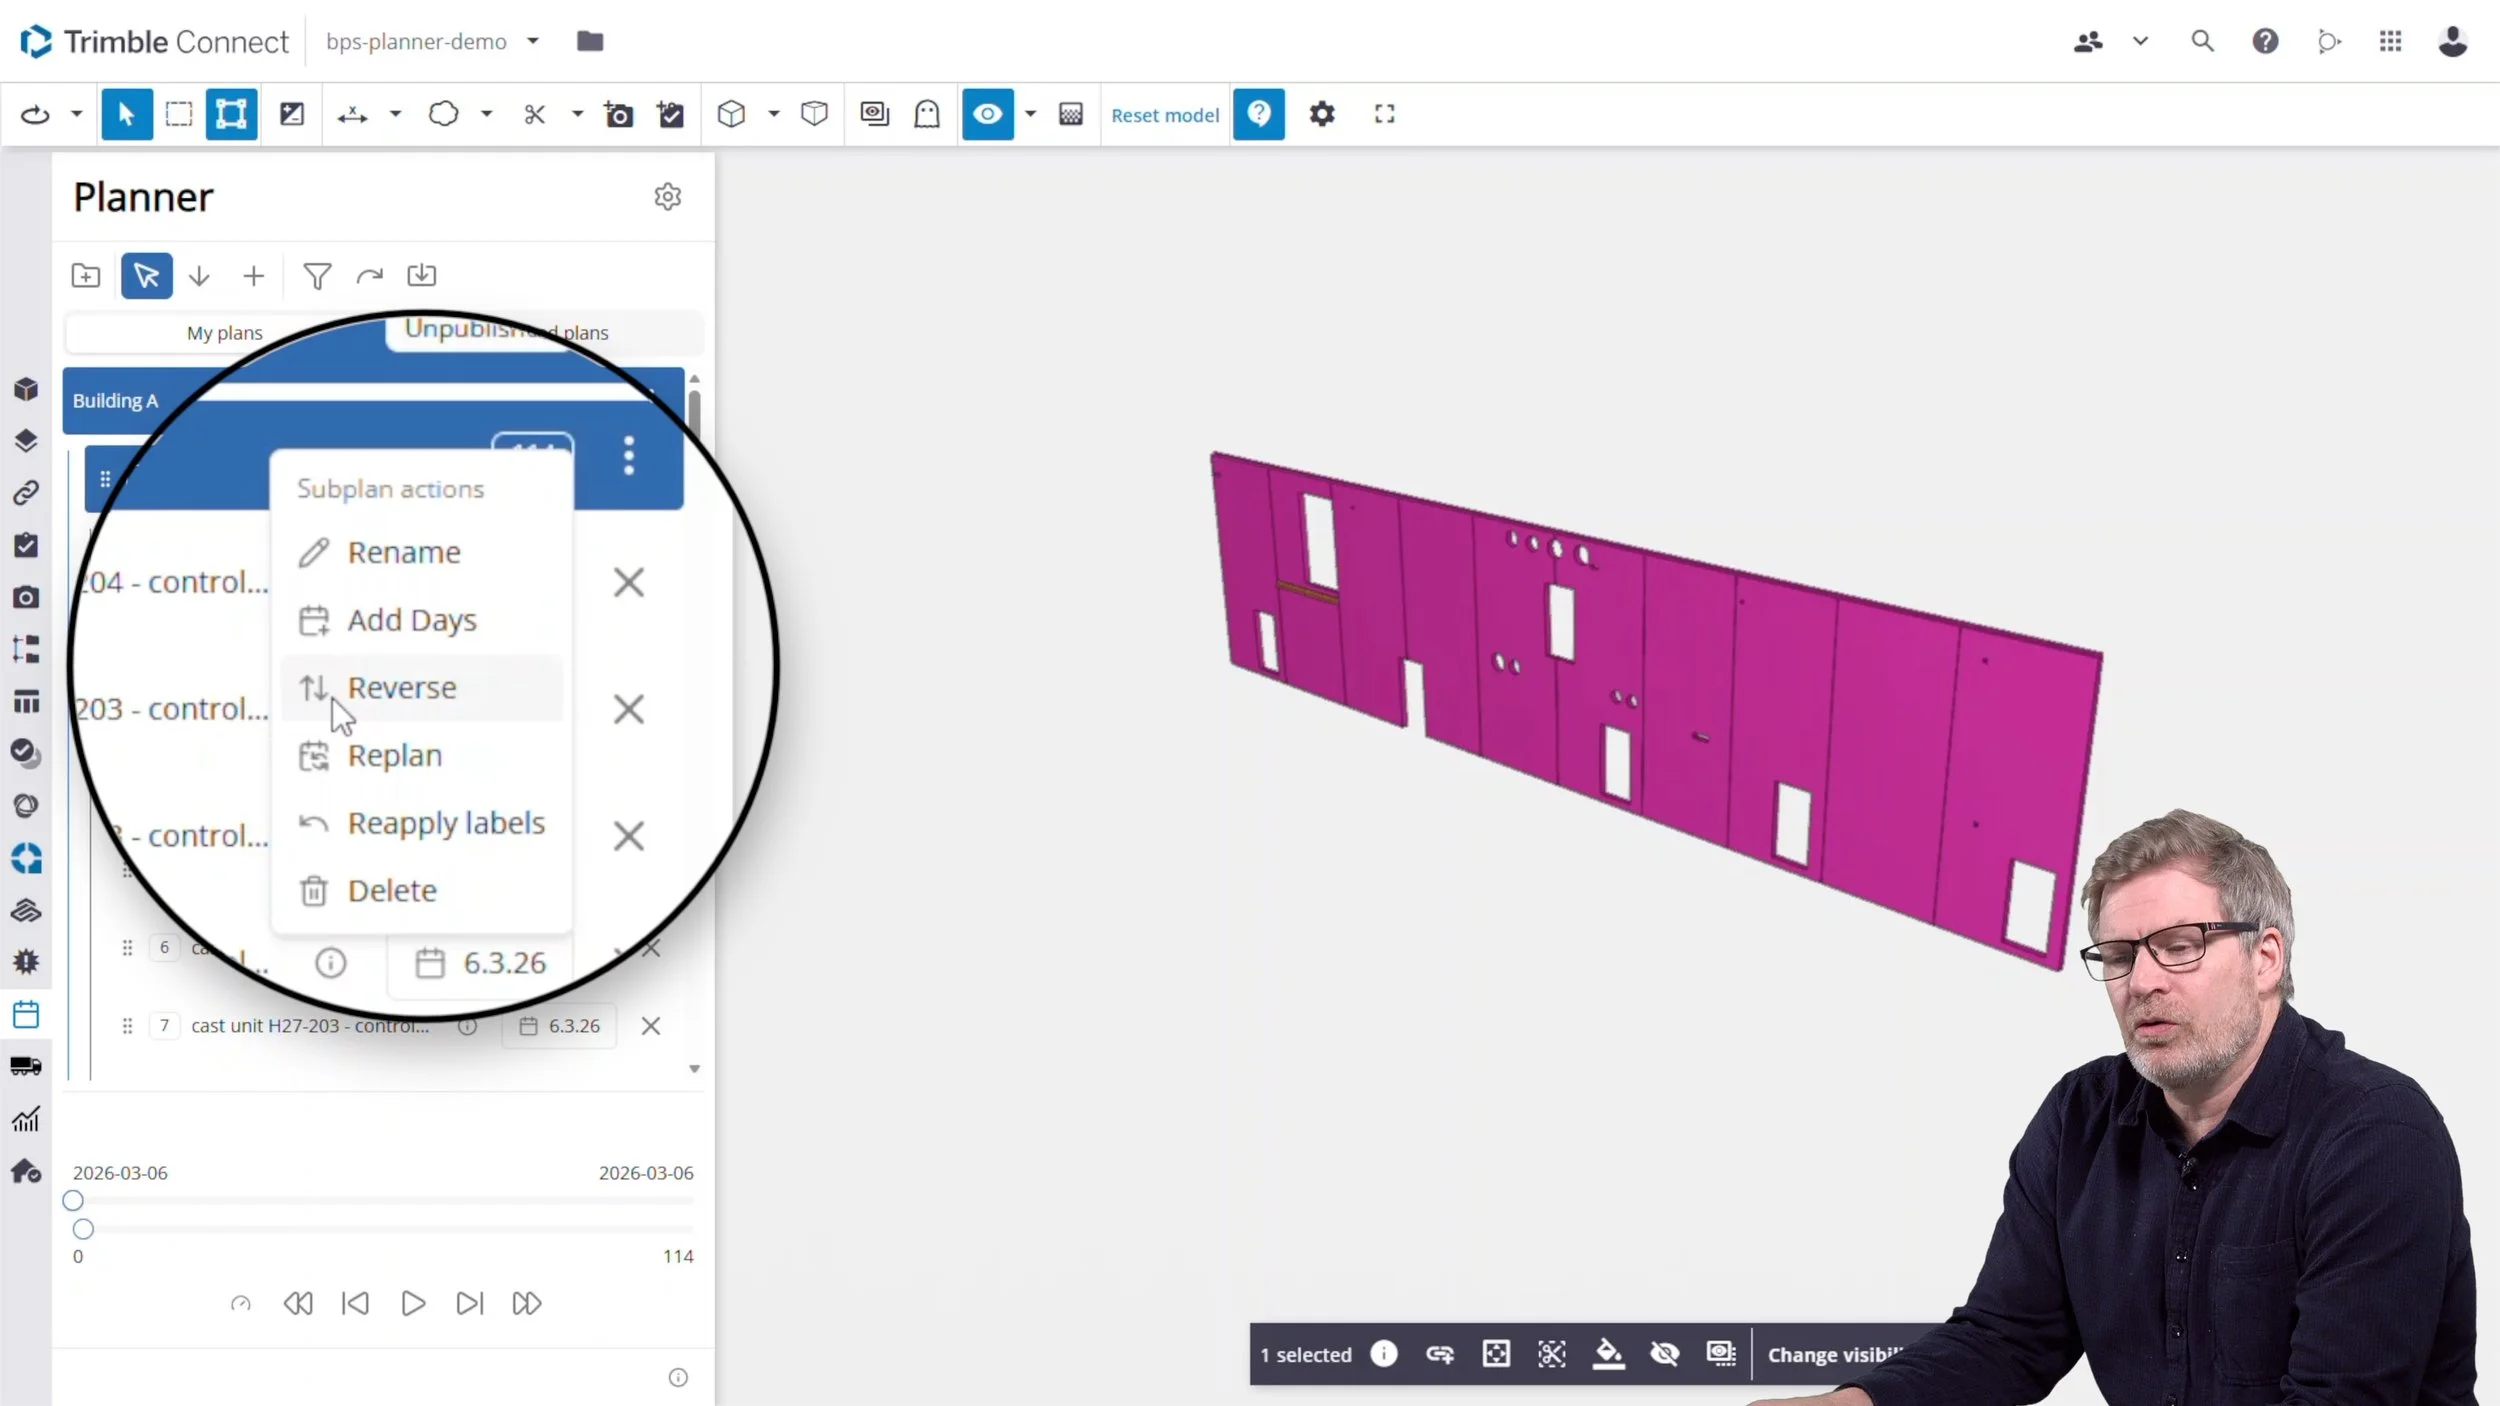
IMAGE: Screenshot from the e-learning showing how you reverse the plan after virtually “disassembling” the building to get the correct installation order for each element
The general workflow in Trimble Connect Planner is built around two main steps:
First define the construction sequence (two main methods)
Then assign dates.
The first example in the training shows how to create an erection plan for the steel and concrete elements in a building project. In this example the sequence is created by virtually disassembling the building and then reversing the order to produce the correct erection sequence.
This method works well for precast and steel projects where the installation order can be planned clearly from the model.
Creating plans and selecting objects
Users should first create a main plan and a sub plan, then work at sub plan level while selecting objects directly in the model. Each selected object becomes a task in the Planner window.
If a mistake is made, tasks can be deleted, moved, or reordered by drag and drop. This makes it possible to build the sequence iteratively without starting over.
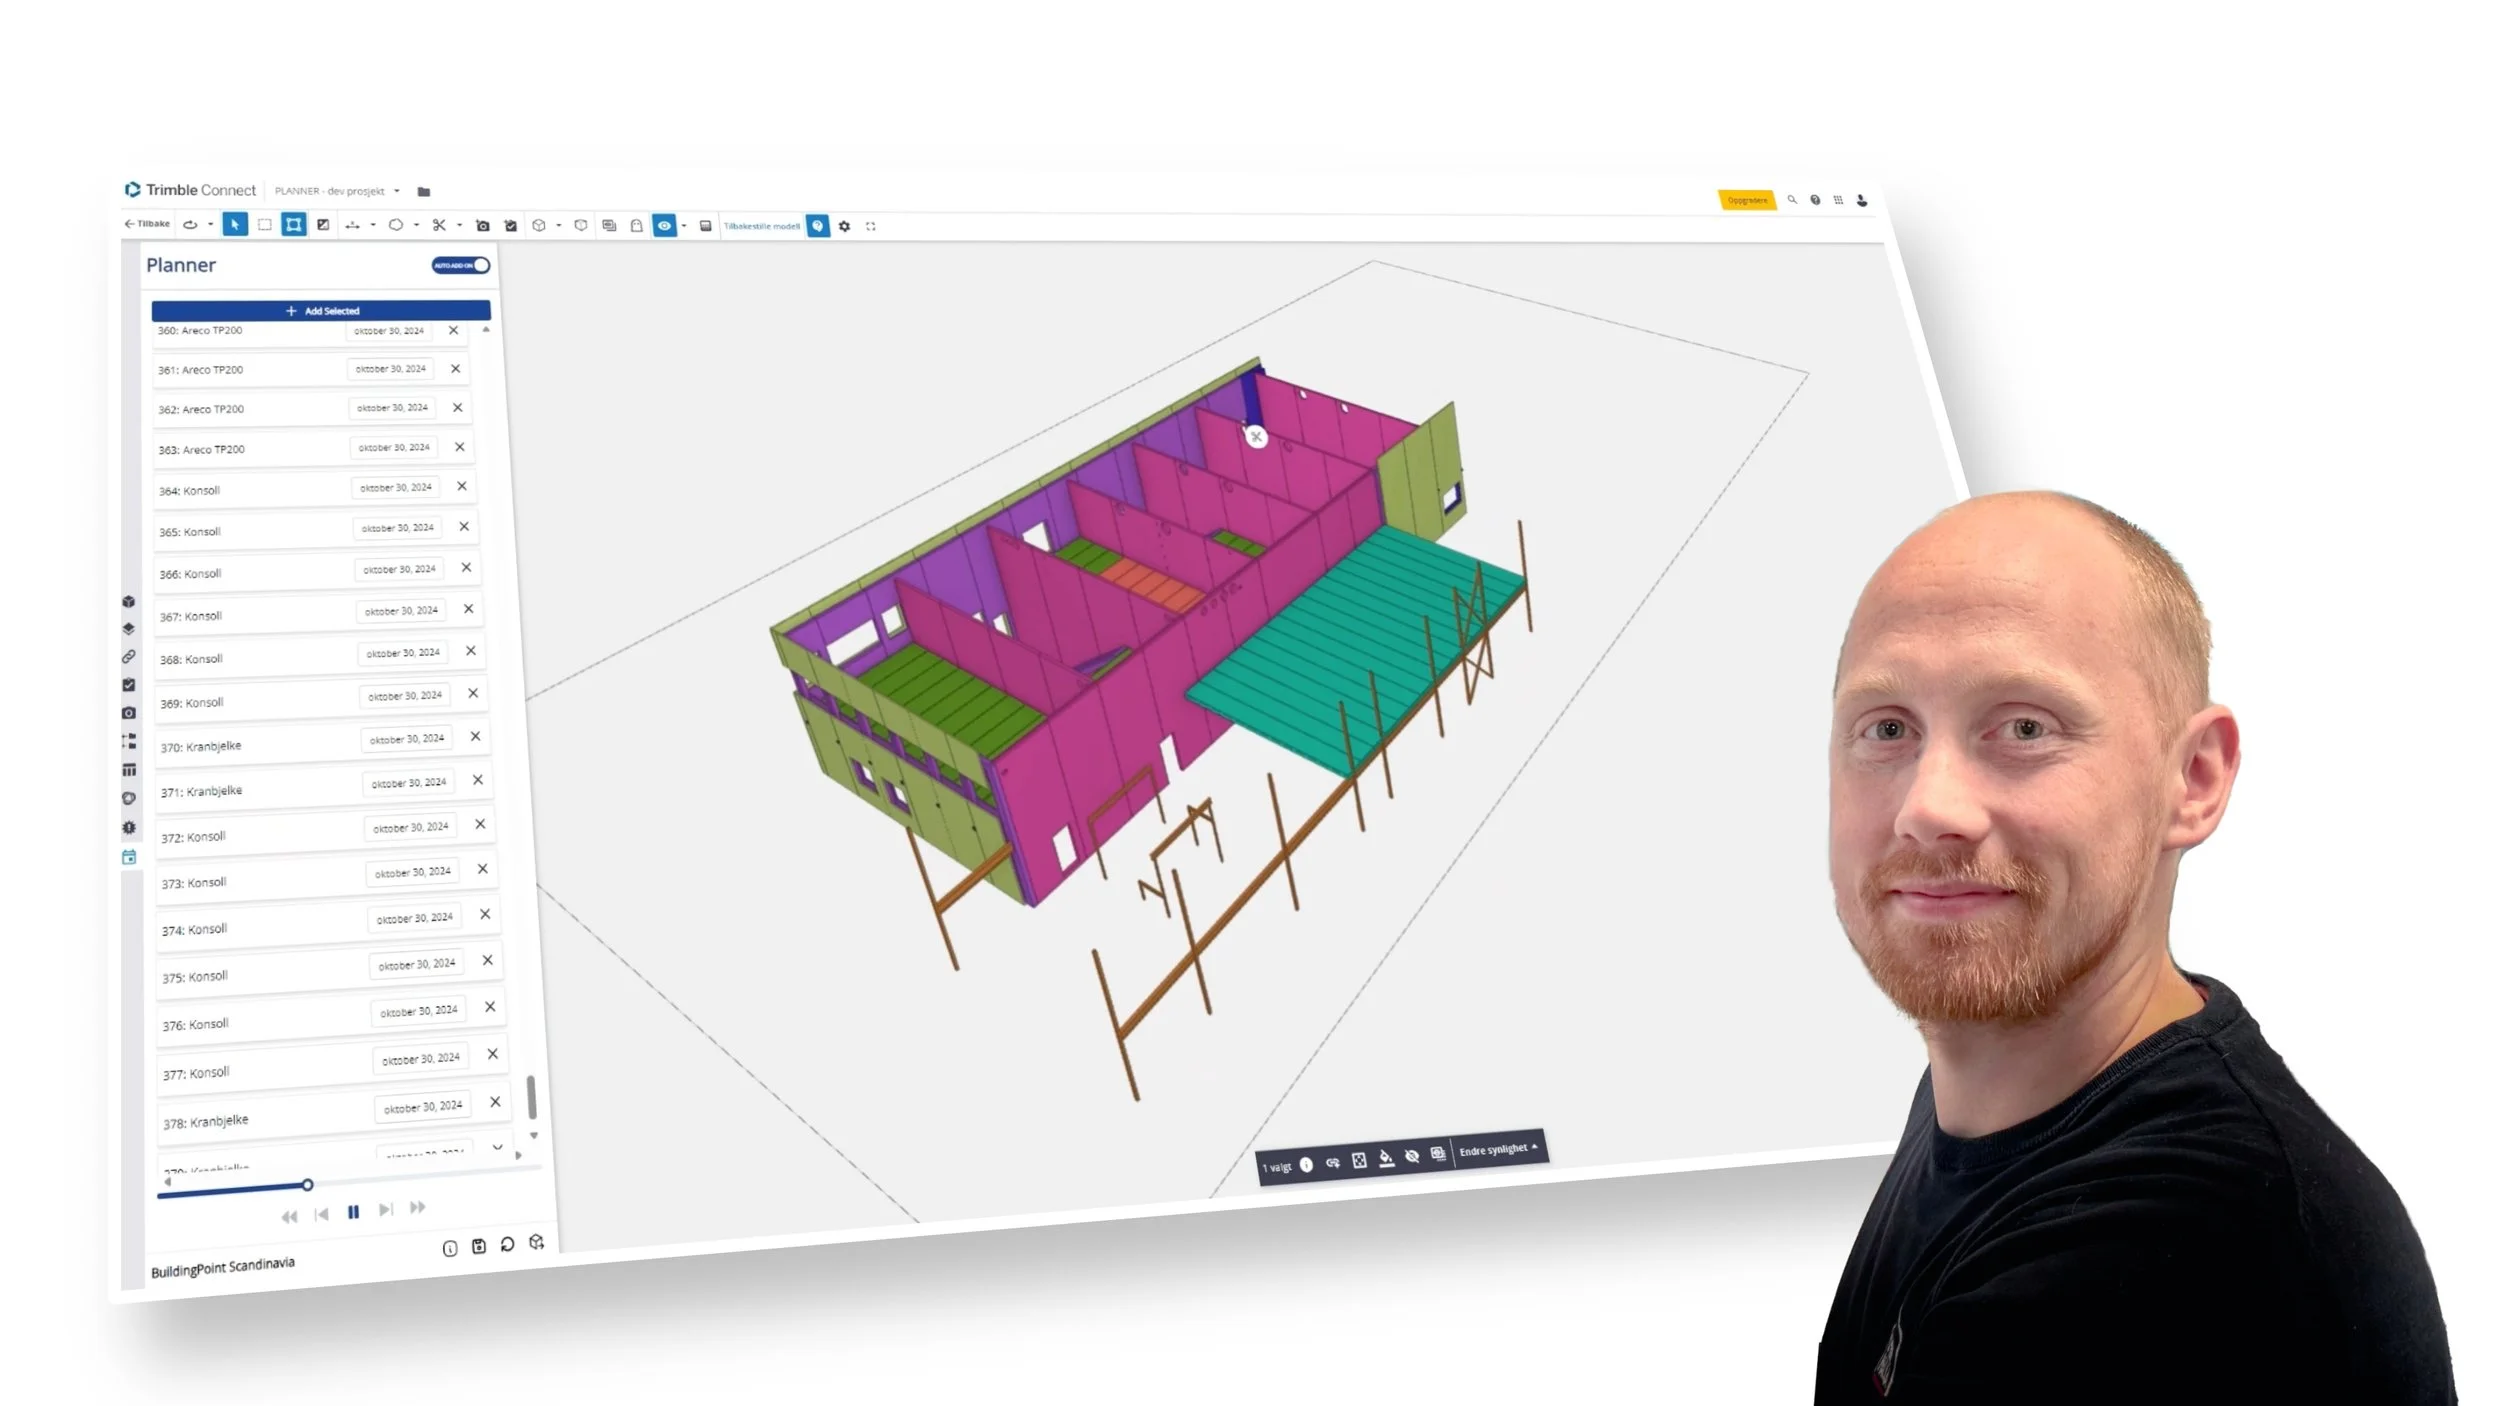
IMAGE: Screenshot from the e-learning showing the Planner graphical user interface inside Trimble Connect. In the example, the instructor shows how users can reorder the installation sequence, and move the task highlighted in dark blue.
Reviewing and correcting the sequence
Once the first version of the sequence has been created, it can be replayed step by step in order to verify that the erection logic is correct. This makes it easier to spot misplaced tasks and adjust them before moving on.
Users can move back and forth in the sequence, identify errors, and correct the task order until the plan reflects the intended construction flow.
Assigning dates manually or automatically
After the sequence is in place, dates can be assigned in different ways. They can be added one task at a time, or applied to multiple tasks at once by selecting several activities together.
Planning can be automated using rules such as a fixed number of tasks per day, while skipping non-working days. This is useful for repetitive installation work, where dates can be distributed systematically across similar tasks.
Publishing, revising, and exporting
Once dates have been added, a view can be attached to the plan so others see the correct perspective when reviewing the published version. The plan is then published and shared with the project team.
After receiving feedback, the user updates the task order, checks the revised sequence, and publishes a new version. Finally, the plan can be exported to TXT or CSV for use in downstream systems.
The steps described above cover the basic workflow in Planner. Continue reading to learn about more useful features and alternative methods.
Example 2: Planning construction in the “correct” order, infrastructure cast-in-place project
The second example presents a planning method that is better suited to infrastructure projects. Instead of reverse planning, the sequence is created in the same order the work will be carried out on site.
Users working on large infrastructure operations, road projects, have found this approach practical.
Group tasks
Several model objects can be combined into a single activity, which is useful when one site operation includes multiple modeled elements but should be handled as one task in the plan.
This helps simplify the schedule while still keeping the visual connection to the model.
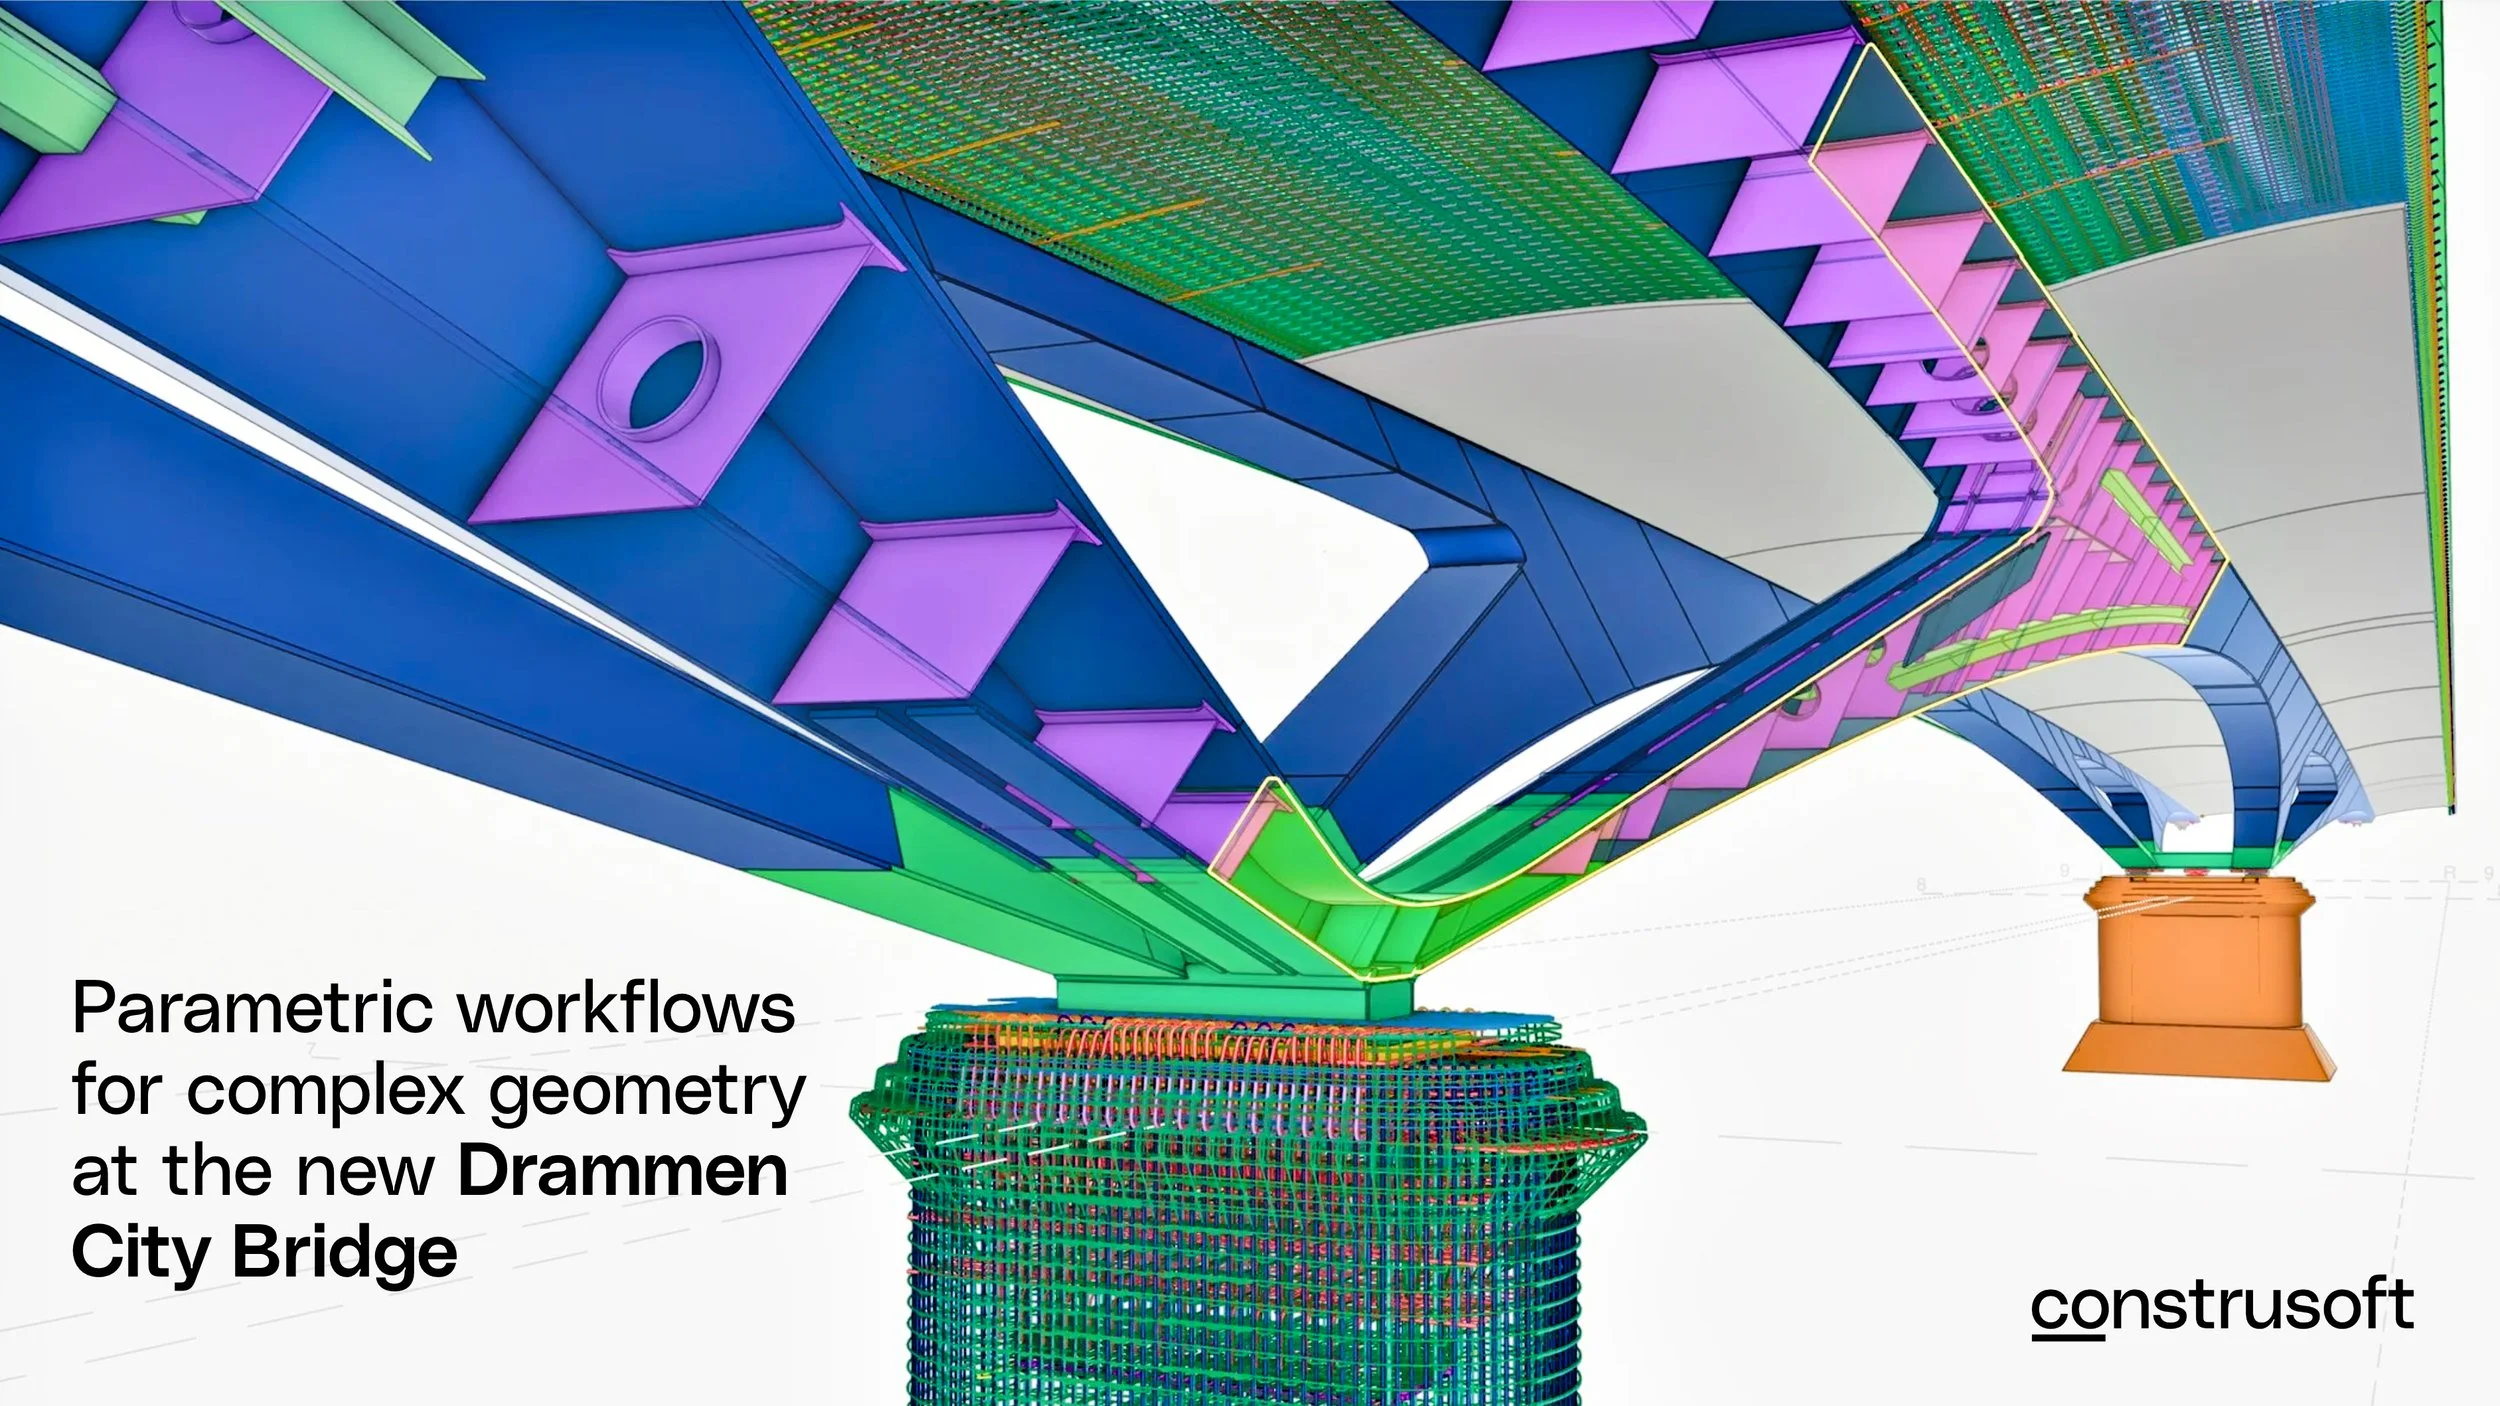
IMAGE: In cast-in-place concrete project planning, and infrastructre projects one may want to use “group tasks” in the plans.
Selecting objects efficiently with Organizer
The example also shows how Organizer can be used to select multiple objects based on structured model information. That is particularly useful in infrastructure projects, where elements such as gravel layers, foundations, concrete sections, and barriers are often modeled as several separate objects.
Using Organizer makes planning faster and reduces the amount of manual clicking needed to create grouped activities.
Adding ”Deconstruction” tasks
IMAGE: ”Deconstruction” tasks can be used to remove objects from the plan. This is a nice feature for temporary objects, like sheet pile walls, scaffolding or movement of soil and other masses, as well as moving cranes, containers and other on-site equipment.
A key difference in this workflow is the use of Deconstruction tasks. In the example, a sheet pile wall is first installed as part of the works, then removed later in the sequence before the next activities continue.
This reflects real site conditions in infrastructure projects, where temporary structures and support systems are often essential to execution but are not part of the finished asset.
This function can also be used for any object that is temporary to define the time when it will removed from the site, relevant for scaffolding, formwork, or event cranes.
IMAGE: Use “Camera States” to create a view related to a task. This can be used to to create nice animations with camera placements that clearly illustrates the construction sequence.
Attaching views and camera states
Once the sequence is complete, views and camera states can be attached to the plan. This improves how the plan is presented to others during review.
By guiding the viewer through selected angles and perspectives, the plan becomes easier to understand, especially for teams who need to assess the sequence visually rather than read it as a list of activities.
Publishing the completed plan
The example concludes by publishing the plan so it can be reviewed by the wider team. At this point, the sequence, grouped tasks, temporary works, and visual settings are all included in one shared 4D plan.
Why views and camera states matter
One of the practical strengths of Planner is that the plan can be communicated visually, not only created visually.
Admin setup
The e-learning also covers settings that are especially relevant for administrators and super users.
Permissions determine who can view, review, edit, or revise published plans. This is important for structuring collaboration across project teams.
Calendar settings define recurring and one-off non-working days, which directly affects automated date calculations. If these are configured early, planning becomes more reliable from the start.
Label templates are another important part of setup. Instead of using generic object names from the IFC model, tasks can be labeled using specific model properties such as cast unit marks, control numbers, or weight. That makes the plan easier to read and more useful for production teams and logistics planning.
The training also explains export settings and control property values, which help preserve task-object connections even when model versions change and object IDs are updated.
IMAGE: In Trimble Connect Planner users with administrative rights can define automatic Task labeling based on IFC properties.
In this example we have labeled the installation tasks for prefabricated concrete elements with the Cast Unit number, Control Number and the weight of the element. Having the weights clearly visible on each task may be useful for crane positioning and planning.
Request access to Trimble Connect Planner
Trimble Connect Planner is a paid extension available from Construsoft.
If you want to evaluate how it could fit your workflow, we can help you get started with the right setup for your type of project.
Fill in the form below to request a quote or get more information about licensing, implementation, and use cases.
IMAGE: Anders Sand-Larsson, Construsoft.
OTHER ARTICLES